skip to main |
skip to sidebar
 It would be awesome if all of us had our own fax machine.We could fax our resume to that new employer to be reviewed right away.Or they might require to get that fax from our landlord so they can move in to that apartment tomorrow.Having a fax machine in your home could save you time in finishing such tasks as getting a brand new job.Now what in the event you can fax documents without having to cough up large bucks to buy a fax machine.
In the event you have a computer with Windows XP, net access, as well as a printer, you already have a fax machine.One of the optional parts in your WinXP application package is the Fax Services Part.This package let you send & get faxes through your computer using regular dial-up net access.
To make use of this Fax Service you will need 3.7megabytes of free hard drive space,a dial-up modem & your WinXP Install CD. Since the transmission is sent through your phone line,a cable modem won't work.
The first thing you must do to make use of the Fax Service is to put in it on your PC.This service is not installed when Windows XP was first installed.Perform the following steps to put in this application.
Insert your installation CD in your CD or DVD drive & the welcome to Microsoft Windows XP will open.If it doesn't open, open My Computer & click five times the CD or DVD drive.Click install Optional Windows Parts.
A menu will open that lists all optional Windows XP parts.Now click the box in front of Fax Services & then click next.Watch the installation status bar & five times its installed click the finish button & exit.You will need to restart your PC to finish the method.
You can now configure the Fax Console by adding your contact information,the modem you will use, & where you require the technique to save a replica of each fax.
To open the application,click on Start,choose All Programs, Accessories,Communications,Fax, the Fax Console, & click next five times it opens.You can now type in the Sender information.
The next step in setting up the Console is to enter your TSD or Transmitting Subscriber Identification information.This permit the recipient's computer to identify your computer as the sender of the Fax.The TSD contains your Fax number or your fax number & name.
You are getting closer to finishing the Console.The CSID is next to be added.Your CSID is your Called Subscriber Identification & it can be the same information that is in the TSD.When you receive a Fax,your CSID will appear on the sender's confirmation page.
Now you must select the routing options for the Faxes you get.You might require the Faxes saved & printed, or save.You now select the printer you require the Fax to be printed on & this will be your default printer.
Click next to reach the last Console Configuration step. Here you confirm the information you entered.A Configuration summary will appear for you to confirm.Once you are satisfied that all information is correct,click finish.
After setting up the Fax Console & done the Configuration setup,you're computer is now prepared to send & get Faxes as any Fax Machine would.The Console pops open automatically & looks similar to the Outlook Express Console.
Now select the tool to sending & receiving Faxes.The modem will appear in the drop-down menu.All you need to do is highlight it & check both send & get.Here is the way you get Faxes using Windows XP.
There's five options to receiving a Fax,Manual & auto answer.Checking the auto mode allows the computer to answer the phone when a Fax is received.To receive a Fax automatically,leave the modem & the computer on & the PC will save received Faxes in the inbox of the Fax Console.
In the event you have one phone line to make use of for your fax & voice calls,its nice to get your Faxes by hand.You will need to be at your computer to receive a fax.When the phone rings,you won't know if its a voice or fax call until you answer it.
A way around this is to call the sender of the fax & ask them to call ahead to tell you the fax is on its way.Then you can hang up, connect your modem to the phone line & wait.When the call comes through,a dialog box appears & will let you get the Fax.
To send a fax you can use the print option to Fax documents from any Windows application.Open the document from any Windows program such as MSWord ,select the printer, & click all right.
The Fax Wizard will now take you by the hand & help you generate a cover page & sending your Fax.After this is done, enter your recipient's information.When entering their Fax number,type it in a format such as +1 (123) 456-7890.
The Fax Console is linked to your Outlook Express Address Book where recipients names can be stored there.Your recipient's name will appear in the Recipient Information Window.
You can now format the cover page by choosing prepared made templates or generate your own.And now you can schedule when your Fax can be sent.To send it now,just click Now.Or you set a time in advance but be positive to leave the modem & computer on when the time comes.
Click next where you can preview the cover page & Fax preview.If all is well,click finish & the Fax Monitor will appear & show you the status of your Fax.You will see a saved copy of your Fax in the event you did not send it now.
By following these steps, you can send a Fax from any Windows application.Such application include Microsoft Word, or Microsoft Excel.You can use a scanner with the Fax Service to made it more versatile.Go over to their web-site at www.support.microsoft.com to learn how to make use of a scanner with the Fax Service.
If you are thinking about using the Fax Service to send faxes, its a nice time while rewading this news story to grab your WinXP CD,install the application & get going.There will be much more help in the application & you'll see how simple it is to fax with Windows XP.
 Up gradation of Windows operating method to its upgraded version allows to make use of the additional benefits added in to the upgraded version. A STOP error message after up gradation method occurs on a method that does not use an Intel processor. Four hazards that you encounter on a STOP error message occurrence are – uncountable hard drive and information inaccessibility. To overcome both of the above hazards, you will need to restore information from an updated backup. However, if no backup is available or backup falls short of restoring the necessary information, then you will need to make use of a powerful Partition Recovery Program to recover you lost files and folders.Think about a practical example, where you upgrade your method (that does not use an Intel processor) to Windows XP Service Pack 2 (SP2) or to Windows XP Service Pack 3 (SP3). After the up gradation method is complete and you restart your method, you encounter the below error message:
“A issue has been detected and Windows has been shutdown to prevent destroy to your computer...
Technical information:
STOP: 0x0000007E (0xC0000005, 0xFC5CCAF1, 0xFC90F8C0, 0xFC90F5C1) SYSTEM_THREAD_EXCEPTION_NOT_HANDLED”The four parameters in the above error message differ due to system’s configuration.
The above STOP error message makes the information saved in the hard drive inaccessible. Moreover, the same error message reappears each time you try to start your computer method.
Cause:
The above STOP error message primarily occurs when a Sysprep (Method Preparation) picture is deployed from a method that does not use an Intel processor from a method that makes use of Intel processor.
Resolution:
For comprehensive solution of the above error message, you will need to make some changes in the computer’s registry. To do so, you will need to take the below steps:
1. First, you will need to restart your method in safe mode
2. Click Start, Run, type regedit, and then click OK to open the Registry Editor window.
3. Search and then click on the below registry key: HKEY_LOCAL_MACHINE\SYSTEM\ControlSet001\Services\Intelppm
4. Right-click the Start entry on the right-pane, and then click on Change
5. Type 4 in the Value information box, and then click OK.
6. Finally, exit Registry Editor and restart your method.
However, in the event you encounter the same error message even when you restart your method, then you will need to make use of advanced Partition Recovery program to recover your information. Such File Recovery utilities employ effective scanning methods to scan and recover information from a storage device.
Stellar Phoenix Windows Information Recovery is powerful file recovery application. It ensures absolute recovery of information from corrupted, deleted, formatted or lost hard drive partitions. The non destructive utility supports185 varied file types. It is compatible with FAT32, VFAT, NTFS and NTFS5 file systems. The tool is designed for Windows 7 (Currently in RC1), Vista, XP, 2003 and 2000.
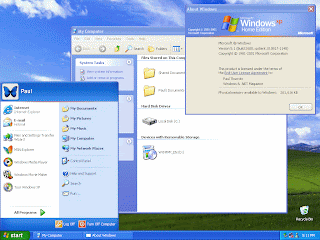 Well, all of us have been there. They turn on our computer (boot up) preparing to type that school document, or business presentation and guess what, our computer does not need to work today. Whether it is the word processor, spreadsheet, or financial package that is not working, most people have no idea that Microsoft Windows XP has a built in feature that may come and save the day. That feature is called "system restore."Fundamentally, process restore is like a tiny hound that runs behind the scenes taking "snapshots" of various parts of the Microsoft Windows XP operating process. So, if an element of Microsoft Windows XP stops working one day, the process restore utility can reference one of the "snapshots" it took and restore your process from a earlier day (a day when your computer worked). It is kind of like going back in time to a day when your computer worked. All of your current information (Microsoft Word files, etc.) are still retained, so you don't must worry about losing any present day files.
In order to restore your computer follow these simple steps:
1. Close any open programs.
2. Click on the Windows "Start" button (normally located on the bottom of your computer desktop)
3. Click on "All Programs"
4. Click on "Accessories"
5. Click on "System Tools"
6. Then click on "system restore"
7. At this point the process restore wizard will launch. You will have seven options:
a. "Restore my process from an earlier date"
b. "Create a process restore point"
In the event you need to restore your process and get it working correctly again, select option "a" and click "Next."
8. On this screen you can select a date from the calendar that you would like to try and restore from. So, in the event you knew that your computer worked fine seven days ago, pick that date on the calendar and click "Next."
9. The next screen is the confirmation window. confirm the information on the screen and click "Next." Windows XP will then reboot and try to restore your process with the settings from the date you chose.
The Process Restore method can take anywhere from 10 to 30 minutes depending on how much reconfiguration Windows XP needs to do and how rapid of a PC you have. When Process Restore is done, a screen wills popup with the results of the restore. If it was successful, you can then log in to the process and start using the computer again. Any quirky issues that you were having are now hopefully gone.
Now, on step 7b above, I mentioned the "Create a process restore point" option. This option is for when you need to force Windows XP to take a snapshot of your process prior to installing a program or adjust any process settings that you are not positive of. It is like a safety net for when you install any net programs (sometimes riddled with spy ware) or process drivers (video, audio, etc). In the event you need to revert back to a virgin state generate a restore point "before" installing any application. This way, if your machine starts acting odd, you can restore your settings from the selected point.
With a tiny practice, the Process Restore utility is simple to make use of and a great way to help make positive the safety of your computer.
Did you find this article useful? For more useful tips and hints, points to ponder and keep in mind, techniques, and insights pertaining to computer tips, do browse for more information at our sites.
 A Master Boot Record (MBR) is the 512-byte boot sector that is the first sector of a partitioned information storage tool such as a hard disk. It's a significant role in method bootstrapping, disk identity, & disk partitioning. It is the main program that is used for bootstrapping the operating method after BIOS executes the machine code instructions. Sometimes, the first sector of the partition gets corrupted because of various reasons such as power fluctuations, human errors, abrupt method shutdown, virus infections, damaged operating method, etc. In such situations, you ought to make use of the Recovery Console to fix the MBR to resolve the issue. However, in case you are unable to solve the issue then you ought to make use of a third-party partition recovery application to recover Windows partition.Think about a scenario wherein your Windows XP method fails to boot up when you start it. A mistake message is displayed, that is:
Operating method not found.
Missing operating method.
& when you start the computer from Recovery Console to fix the errors, you will get the following error message:
Setup did not find any hard drives installed on your computer.
Cause:
There could be various reasons for such behaviour such as:
The hard disk is broken.
An incompatible partition is marked as Active.
Sector 0 of the physical hard disk drive has an incorrect or malformed master boot record (MBR).
A partition that contains the MBR is no longer active.
The basic input/output method (BIOS) does not detect the hard disk.
Resolution:
To resolve this issue, you can perform the following methods:
Confirm the BIOS settings: Check whether your system's BIOS settings are proper to make definite that BIOS lists & recognizes the hard disk.
Use Recovery Console: Use the Recovery Console to run the fixmbr command to repair the MBR of the method drive.
The aforementioned methods ought to be able to resolve the error message. However, in case you are unable to address the situation then you ought to make use of a third-party Windows partition recovery application to recover the partition. Such read-only tools can recover information using quick yet sophisticated scanning algorithms.
Stellar Phoenix Windows Information Recovery application is a partition recovery application that lets you recover lost, deleted, or formatted partitions. It can recover information from both FAT & NTFS file systems. In addition, this partition recovery application can recover deleted emails from MS Outlook & Outlook Express. It is compatible with Windows 7, Vista, Server 2003, XP, & Server 2000.
 While Windows 7 shown in the sight Windows XP is still used by a immense amount of people , yet, extended time usage can corrupt vital Windows registries, several viruses could destroy indispensable Windows files which make our Windows difficult to make use of sometimes. When this happens it is lovely to have a backup solution. & happily there's a couple ways to work out it, but I need to speak in relation to Automated Technique Recovery Wizard (or ASR method) which happen to be within Windows XP Professional. The benefit is that they don't necessitate to put in whichever focused package & it is not challenging to make that.All you need is: a blank floppy disk, the Windows XP Professional CD & some free space to the location where you need to put the backup file.
The program is named backup & it can be present in Start – Programs – Accessories – Backup. More quickly to access it is to type in Start – Run : ntbackup, which is the name of the this small program. After you start it & the welcome screen appears you pick the Advanced Mode. In the Advanced Mode of the Backup Utility you have three options to pick: Backup Wizard, Restore Wizard & Automated Technique Recovery Wizard. The first option is in case you need to do a manual choice of the directories & partitions, for example in case you have important documents located elsewhere. The second is used to restore an already made backup. The third is used to generate a backup of the whole Windows Operating Technique which is usually located on C:\ partition. If by any circumstance your technique is located elsewhere(another partition) you can select the first option & pick by hand from the drives.
In case you pick Automated Technique Recovery Wizard you are asked on the next window screen only about the location of the backup file where it would be created. You can pick any name & location you need. It requires only to have free drive space. Finishing the Automated Technique Recovery Preparation Wizard is the final stage. When you click on Finish the program will start processing & then the backup operation will start. The backup is made in one file which is having *.bkf extension. The method is taking about 10 minutes but could be also less. After the picture of Windows file technique is made you are asked to insert the floppy disk. This is used if your technique fails to boot & you must boot from the Windows XP installation disk. The diskette will help you start the rescue program & restore the backup picture.
After all it is done you can remove the floppy from its drive. You can also generate scheduled automated backups with Schedule Jobs.
 Disk partitioning is the feature in operating systems that involves dividing the hard disk in to various logical parts referred as partitions. Partitioning lets you keep the information files away from the system-related files. This way, you also have a separate area for virtual memory swapping, which leads to increased performance & reduced turnaround time of the process. However, sometimes the partitions in the process get corrupt due to various reasons such as virus infections, human errors, power outages, corrupt operating process, etc. In such cases, you ought to take appropriate steps to resolve the issue. However, in the event you are unable to perform partition recovery then you ought to make use of third-party Windows partition recovery program to recover Windows partition.Think about a scenario wherein you are unable to start your Windows XP process. A mistake message is getting displayed, that is:
“Windows could not start because the following file is missing or corrupt.
Windows root\system32\hal.dll.
re-install a replica of the above file.”
Cause:
There could be the following reasons for the aforementioned error message:The process has a bad partition or a bad boot record.
The Hal.dll or the Ntoskrnl.dll file are corrupted because of the file process corruption.
The Hal.dll & the Ntoskrnl.exe files are mismatched.
Resolution:
For each of the aforementioned cause, you can perform the following methods, respectively, to perform partition recovery:
Run the fixmbr command from the Windows XP Recovery Console to repair the Master Boot Record (MBR).
Run the fixboot command from the Windows XP Recovery Console to write a new boot sector on the process partition, if the process drive is FAT partitioned. Then, run the fixmbr command to repair the MBR.
In the Recovery Console, run the Bootcfg.exe command to rebuild the Boot.ini file.
However, in the event you are still unable to resolve the issue then you ought to make use of a third-party partition recovery program to recover partition. Such read-only tools can make use of speedy yet sophisticated scanning algorithms to perform partition recovery without overwriting the original information.
Stellar Phoenix Windows Information Recovery is partition recovery program that lets you recover Windows partition. It can recover the information from lost or formatted partitions from various storage media such as pen drive, hard disks, outside hard drives, etc. This Windows partition recovery program can recover lost information from both FAT & NTFS file systems. In addition, this tool can recover lost emails from MS Outlook & Outlook Express. It is compatible with Windows 7, Vista, Server 2003, XP, & 2000.
 A multi-boot surroundings allows a user to access two or more operating systems in a single-computer technique. These operating systems are stored in different hard drive partitions. The environment also allows the user to re-install any operating technique on any hard drive partition. While the method of re-installing the operating technique is simple, it might lead to corruption of boot loader. This primarily happens when the re-installing method is not performed systematically or gets interrupted. In most of these situations, other hard drive partitions also become unmountable, rendering to inaccessibility of information saved in them. To overcome such situations, the user needs to format the hard drive, re-create all the partitions, & restore information from an updated backup. But, in case of no backup availability, the user needs opt for an efficient Partition Recovery Application.Think about a practical scenario, wherein you have a multi-boot technique with Windows XP & Windows 7. The Windows 7 hard drive partition gets infected with a virus & you pick to reinstall Windows 7. However, while re-installing Windows 7, the technique shuts down due to power failure. Now when you restart your technique, you encounter the below error message:
“NTLDR is missing...press any key to restart”
After the above error message appears, Windows XP based partition becomes unmountable, rendering to inaccessibility of saved information.Cause:
The root cause for the occurrence of the above error message is corruption in boot loader due to improper technique shutdown in the coursework of re-installation of operating technique (on a different hard drive partition).
Resolution:
To resolve the above error message, you will need to follow the below steps:
1.Format your hard drive.
2.Recreate all the Windows based hard drive partitions.
3.Restore information from a comprehensive backup.
However, in situations where no backup is available, you will need to search for a third-party Partition Recovery Application that can recover formatted hard drive partitions & information within them. Such Partition Recovery tools are basically available on the Net & do not need any prior technical knowledge to perform recovery.
Stellar Phoenix Windows Information Recovery is a complete & systematic solution to perform recovery of formatted hard drive partitions. The application is competent in recovering any hard drive partition, irrespective of its size. Supported by NTFS, NTFS5, FAT12, FAT16, FAT32, & VFAT file systems, the Partition Recovery gizmo allows the user to save the partitions at user-specified locations.


